How To Install Windows 7 From USB Using A Bootable USB
This is no longer rumor about how to install windows 7 from USB which is great and much more easily, normally sometimes it takes hours to install windows 7 on your computer or laptop using the normal CD or DVD but with the use of the USB method you can install windows 7 within minutes sometimes 20 minutes and you are done installing the operating system. So in these post I will share with you how to install windows 7 using this method.
Installing windows 7 using USB is lot more easier like I said above, but before this process can be successful, you need some things, first you need to create a ” Bootable USB ” this is the USB that will be used to install the windows 7, the USB can be a Storage device such as Flash drives. So normally you just don’t copy and paste the windows 7 setup or iso file into the flash drive somethings has to be done.
How To Create A Bootable USB Easily
Now this bootable USB drives has to follows some process before it can be ready for this process but first you need some things such
- USB Flash Drive (minimun of 4GB in size)
- Windows 7 ISO Image file
- Windows/ USB/DVD Tool (which you can download from here)
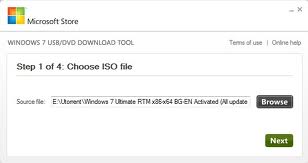
Step 1:
Install the Windows/ USB/DVD Tool on your computer, after installing double click on the icon and after doing that you can select the windows 7 ISO Image file from your computer hard disk, this is the windows 7 that you want to insert inside the Bootable USB.
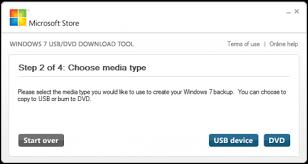
Step 2:
After doing that, you will be asked by the software if you want to create a DVD or a USB for your USB drive so you select the USB option and wait.
Carefully select the right options that comes up after selecting the USB option in the software, normally do not leave any file or data in the USB Flash Drive. Usually you can move or format the USB.
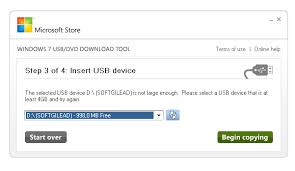
Step 4:
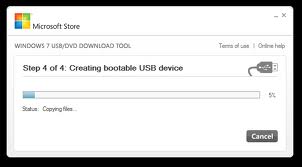
The software will check the USB which you want to make bootable to install windows 7 via USB it will scan through the USb and if the space is not enough for it , you will be notified about it and the software will be deleting the files in the USB if there is and it will start copying the windows 7 file into the Flash drive and it does not usually take time copying.
Step 5:
Once the process is complete you will be notified and now you have successful created a bootable drive which we will use in how to install window 7 from USB which takes less time to install. So you can now eject the bootable USB drive from your computer.
A Must Read: How to Boot Windows 8 In Safe Mode
How To Install Windows 7 Via USB
So after learning how to creating a bootable USB drive for the installation, you will have to insert it in the computer you want to install the windows 7 OS to. Then you need to know how to access the computer BIOS normally different computer and laptop have different one normally it between F1, F2, F12, ESC, Backspace, or Escape try them one by one after you restart the computer or while restarting the computer.
And when one works and takes you to the BIOS place, then change the setting to boot from USB by press F6 to move the selected USB device on top and after doing that you can now save it and then restart it again or it will restart automatically.
Benefits Of this ” How To Install Windows 7 From USB ” Method
There are lot of benefits and advantages of using this method which I will list below
- It saves times
- It installs much more faster than CD
- Having windows 7 on a USB is much more better than having it on a CD
Those are just few of the advantages for you in know how to install windows 7 via USB , I hope you now know how to do it on your own, if you have any problems please use the comment box or tell me how your went when you tried it.

0 Comments:
Post a Comment
Subscribe to Post Comments [Atom]
<< Home